I haven't shown you much of my bedroom before, have I? There's a reason for that. Well, a couple actually. For one thing, the room is tiny. Like really tiny. About 12 x 15 to be exact. And that makes photographing it very difficult. But more importantly, it's been completely neglected since we moved in over 18 months ago. It got painted right away (had to cover up that
horrible faux job it started with), and I made
curtains (which I recently swapped out for something different), but aside from that it's been untouched and unaccessorized for the entire time. I haven't made much progress, but did finally tackled one item on that room's to do list the other day - getting a headboard up.
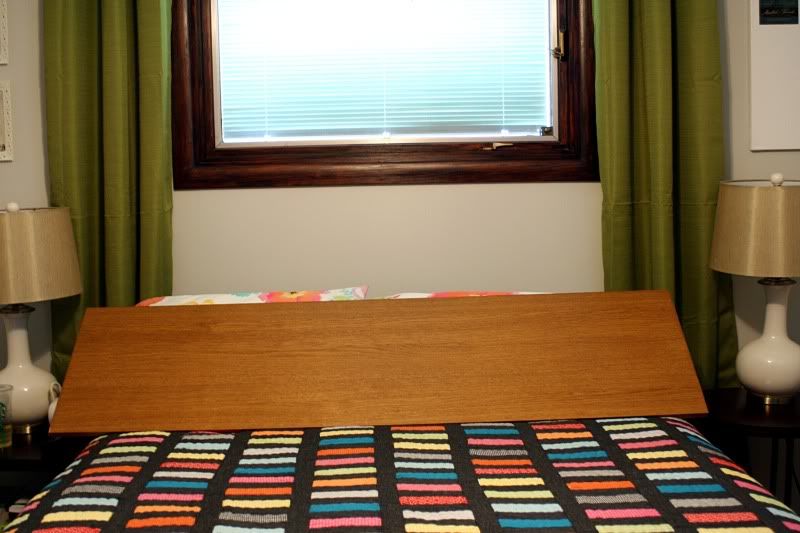
When I started my little project the view of the bed was just what you see above. The window basically functioned as a headboard and that worked just fine for me. The problem is what you can't see. We have baseboard heating and it's positioned right under the head of the bed. With pillows resting up against the wall the heat, and more importantly the A/C, was blocked completely. Something had to be done.
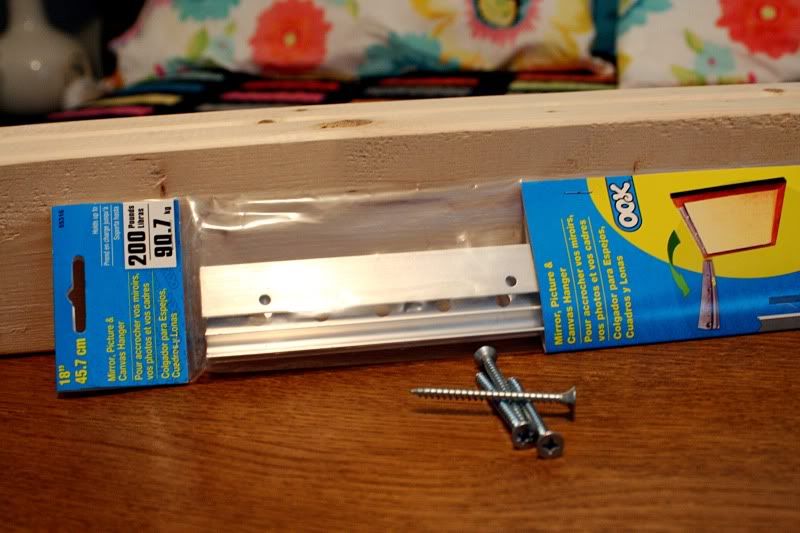
So I picked up a piece of wood from the As-Is section of Ikea for just $4. I'm not sure what it was meant for (a dresser maybe), but I liked the color and the size was right - it was a few inches wider than a queen mattress and about 15 or so inches high. That plus some spare pieces of wood and a heavy duty picture hanger was all I needed to create a headboard that would allow air to flow up behind the mattress and pillows.
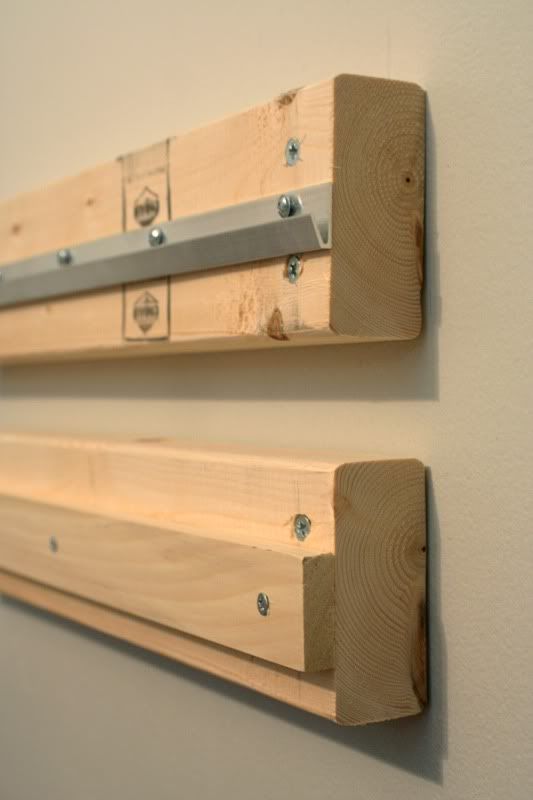
I began by attaching 18 inch lengths of 2x4s to the studs. The idea was that rather than attaching the headboard directly to the wall, the 2x4s would create a gap between the headboard and the wall that would allow air to flow. And while the top 2x4 is the only one that was actually going to be attached to the headboard, I figured the bottom one would provide a bit of stability in that it wouldn't allow the headboard to angle toward the wall.
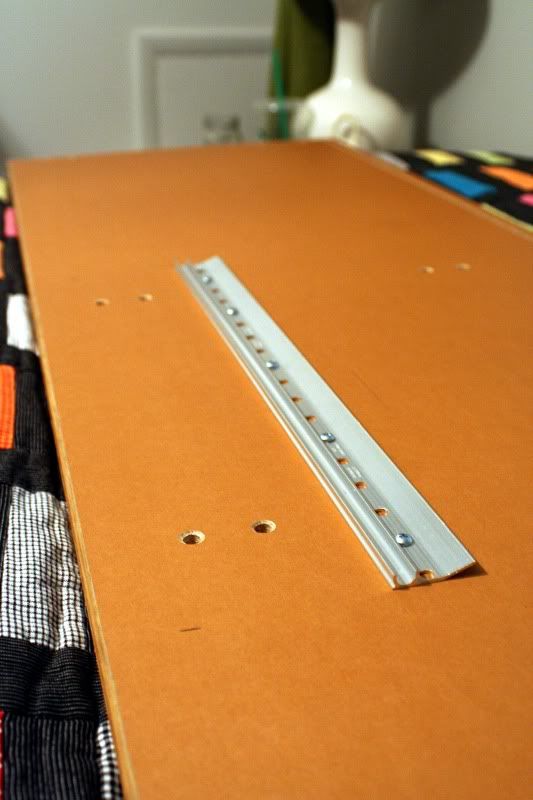
Next up I attached one half of the picture hanger to the top 2x4. It came with screws and a tiny level, so this part of the process was pretty simple. But it was then that it occurred to me that the picture hanger was adding some extra depth to the top 2x4 that the other didn't have. So out came another piece of spare wood that I attached to the bottom 2x4 to make them even again. After that, it was as easy as screwing the other half of the picture hanger to the headboard and putting it up. The halves of the picture hanger slide into one another and can be adjusted side to side to ensure it's positioned correctly. Any fool can do it (ahem, me).

I'm super happy with the result! I think the wood tone brings a nice warmth that the space was lacking before, and I definitely can't complain about the cost. About $20 or so ($15 for the picture hanger and $4 for the Ikea remnant). Not to mention, it does exactly what I need it to do - let's the air flow up the wall. My nights have been noticeably cooler!
On a side note, I used another of those picture hangers to hang a giant chalkboard (it's 5 feet wide) in my dining room. And we've gotten new dining room chairs (
ask and ye shall receive), and done a little rearranging in the living room. Definitely a lot of movement around our house!!
So, what have you been up to? Any great cheap fixes you've made lately?
P.S. Happy, happy, happy, happy, HAPPY BIRTHDAY Caleb!! And Keira too!


Katie , headboard looks great. You are amazing . Pj
ReplyDeleteThe color looks really good with the comforter. Very nice!
ReplyDeleteKatie! Your headboard is perfect and your bed is so sweet! LOVE those lamps, too! Great fix. Painting my 1/2 bath to touch up the holes.
ReplyDeletexxo